AS 1755 Conveyor Safety

Designing Conveyor Guarding for Compliance, Safety, and Practical Operation

Conveyors are widely used across processing, manufacturing, and materials-handling environments, but they also present some of the most persistent safety risks in industrial operations. Entrapment, nip points, rotating components, and maintenance access are all recognised hazards that must be managed through proper design and guarding.

In Australia, these risks are addressed through AS 1755 โ€“ Conveyors โ€“ Safety Requirements, which establishes the minimum safety expectations for conveyor systems across their full lifecycle, from design and installation through to operation and maintenance.

This article outlines what AS 1755 requires, why compliant conveyor guarding is critical, and how engineering-led design plays a key role in achieving practical safety outcomes.
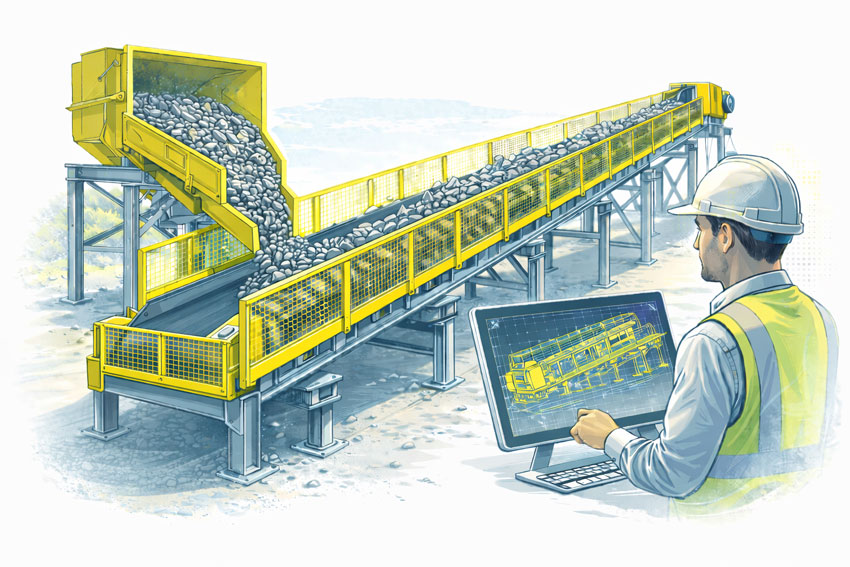

Bulk materials conveyor with compliant safety guarding at the hopper, tail end, and along the conveyor, shown with an engineer reviewing guarding design drawings.

What Is AS 1755?

AS 1755 is the Australian Standard that defines safety requirements for belt conveyors and other conveyor systems. It addresses both new and existing installations and applies to conveyors used in industrial, commercial, and processing environments.

Rather than focusing on individual guarding components in isolation, AS 1755 considers the conveyor system as a whole, including how people interact with it during normal operation, inspection, cleaning, and maintenance.

The standard is referenced by regulators, safety professionals, and engineers as the primary benchmark for conveyor safety in Australia.


Key Safety Principles in AS 1755

AS 1755 is built around a number of core safety principles that influence how conveyor guarding should be designed.

These include eliminating hazards where possible, controlling remaining risks through engineering solutions, and ensuring that guarding does not introduce new risks by restricting access or encouraging unsafe behaviour.

In practice, this means that compliant guarding must be effective, durable, and suitable for the operating environment, while still allowing conveyors to be inspected, cleaned, and maintained safely.


Conveyor Guarding Requirements

A major focus of AS 1755 is the control of access to hazardous areas. This includes guarding of:

  • Drive pulleys and tail pulleys
  • Return rollers and idlers
  • Nip points and shear points
  • Rotating shafts and couplings
  • Chain drives, belt drives, and gearboxes

Guarding must be designed so that body parts cannot access hazardous zones, taking into account reach distances, openings, and the position of the conveyor relative to walkways or platforms.

Importantly, AS 1755 recognises that guarding must be fit for purpose. Poorly designed guards that are difficult to remove, inspect, or maintain are often bypassed or removed altogether, creating new safety risks.


Fixed Guards vs Interlocked Guards

AS 1755 allows for different types of guarding depending on the application and risk profile.

Fixed guards are commonly used where access is not required during normal operation. These guards must be securely fixed and require tools for removal.

Interlocked guards may be required where regular access is necessary. These systems ensure that the conveyor cannot operate while the guard is open or removed, reducing the risk of exposure to moving parts.

Selecting the appropriate guarding strategy requires an understanding of how the conveyor is used in practice, not just how it appears on drawings.


Existing Conveyors and Retrofit Challenges

Many conveyors currently in service were installed before the latest versions of AS 1755 were adopted. In these cases, compliance is often achieved through retrofit guarding rather than full replacement.

Retrofitting guarding to existing conveyors introduces additional challenges, including:

  • Limited space around existing equipment
  • Incomplete or outdated drawings
  • Structural constraints
  • Ongoing operation during upgrades

Engineering-led assessment and accurate documentation of existing conditions are critical when designing retrofit guarding solutions that comply with AS 1755 without disrupting operations.


The Role of Engineering in Conveyor Guarding Design

AS 1755 does not provide prescriptive โ€œone-size-fits-allโ€ guard designs. Instead, it sets performance requirements that must be interpreted and applied by competent professionals.

Engineering input is essential to ensure that conveyor guarding:

  • Addresses all relevant hazards
  • Integrates with existing mechanical and structural systems
  • Can be fabricated and installed accurately
  • Supports safe maintenance and inspection activities

Poorly engineered guarding may appear compliant on paper but fail in real-world use.


Documentation, Verification, and Ongoing Safety

Compliance with AS 1755 is not a one-time activity. Conveyor systems evolve over time as layouts change, equipment is upgraded, and operating practices shift.

Clear documentation of guarding design, installation, and assumptions provides a baseline for future modifications and safety reviews. This documentation is also critical when demonstrating due diligence to regulators or during incident investigations.


Why AS 1755 Matters

AS 1755 exists to prevent serious injuries and fatalities associated with conveyor systems. When applied correctly, it provides a structured framework for identifying hazards, implementing effective controls, and maintaining safe operation over the life of the equipment.

Achieving compliance requires more than installing mesh around moving parts. It requires understanding how people interact with conveyors and designing guarding that supports safe behaviour rather than working against it.


Hamilton By Design logo displayed on a blue tilted rectangle with a grey gradient background

Conveyor guarding designed in accordance with AS 1755 is a critical component of safe industrial operations. Engineering-led design, accurate documentation, and practical consideration of maintenance and operation are essential to achieving compliance that works in practice.

When conveyor safety is treated as an engineering problem rather than a checkbox exercise, the result is safer equipment, fewer incidents, and more reliable operations.

Manufacturing and production services button

Our clients


Name
Would you like us to arrange a phone consultation for you?
Address

AS ISO 5725 and 3D LiDAR Scanning

Why Accuracy, Precision, and Calibration Matter for Engineering Outcomes

When 3D LiDAR scanning is used for engineering, fabrication, or certification, the most important question is not how detailed the point cloud looks, but whether the measurements can be trusted.

This is where AS ISO 5725 โ€” Accuracy and Precision of Measurement becomes relevant. While AS ISO 5725 is not written specifically for LiDAR scanners, it defines the principles that determine whether any measurement system is suitable for engineering use.

In practical terms, AS ISO 5725 separates data that can support engineering decisions from data that is visually convincing but technically unreliable.


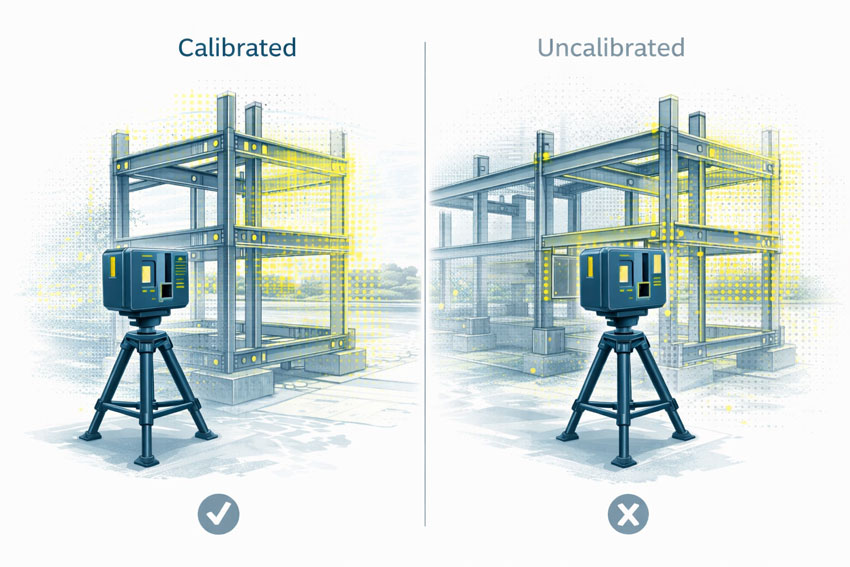
Comparison of calibrated and uncalibrated 3D LiDAR scanning, showing a calibrated scanner with aligned point cloud and steel frame geometry, and an uncalibrated scanner with visibly misaligned measurement data

What AS ISO 5725 Covers

AS ISO 5725 defines how measurement systems should be evaluated in terms of:

  • Accuracy
  • Precision
  • Repeatability
  • Reproducibility
  • Measurement uncertainty

These principles apply directly to 3D LiDAR scanning because a LiDAR scanner is, at its core, a measurement instrument. When scanning data is used to inform design, fabrication, or certification, the expectations set by AS ISO 5725 apply regardless of scanner brand or software.

This is why engineering-grade 3D LiDAR scanning requires more than simply capturing a dense point cloud. It requires controlled measurement, understood uncertainty, and validated outputs, as delivered through engineering-grade 3D laser scanning workflows:
https://www.hamiltonbydesign.com.au/home/engineering-services/3d-laser-scanning/


Accuracy vs Precision in LiDAR Scanning

AS ISO 5725 makes a clear distinction between accuracy and precision, a distinction that is often misunderstood in reality capture.

Accuracy describes how close a measurement is to the true value.
Precision describes how consistently the same measurement can be repeated.

A LiDAR scan can appear highly precise, with clean and consistent geometry, while still being inaccurate if the scanner is miscalibrated or poorly controlled. In engineering terms, repeatable errors are still errors.

For engineering and fabrication, both accuracy and precision are required.


The Role of Calibration

Calibration ensures that a scannerโ€™s distance and angular measurements align with known reference values. Without calibration, a LiDAR scanner may still operate normally and still produce visually impressive results, but the measurements no longer have a known or defensible level of uncertainty.

Calibration directly affects:

  • Distance measurement
  • Angular accuracy
  • Alignment between internal sensors
  • Registration between multiple scans

AS ISO 5725 does not prescribe how calibration must be performed, but it does establish the expectation that measurement uncertainty is understood and controlled.


What Happens When Scanning Is Not Calibrated

When LiDAR scanning is not properly calibrated or verified, errors propagate into every downstream deliverable.

Common outcomes include:

  • Fabricated steelwork that does not fit on site
  • Bolt holes and connection points outside tolerance
  • Frames requiring on-site modification or rework
  • Assumed clearances that do not exist in reality
  • Delays or challenges during engineering sign-off

These issues are often discovered late in a project, where the cost of correction is highest. The root cause is frequently measurement error introduced at the scanning stage, not fabrication quality.

This is particularly critical in design-for-fabrication workflows, where scanning data is used to develop fabrication-ready designs:
https://www.hamiltonbydesign.com.au/fabrication-product-design/


The Compounding Effect of Small Errors

One of the most significant risks in unverified scanning workflows is that errors are often small enough to go unnoticed early.

A few millimetres of error at the scanning stage can compound into much larger discrepancies once geometry is modelled, detailed, and fabricated. Across multiple interfaces, these small deviations can lead to misalignment, rework, or compromised installation quality.

For fit-first-time fabrication, this risk is unacceptable.


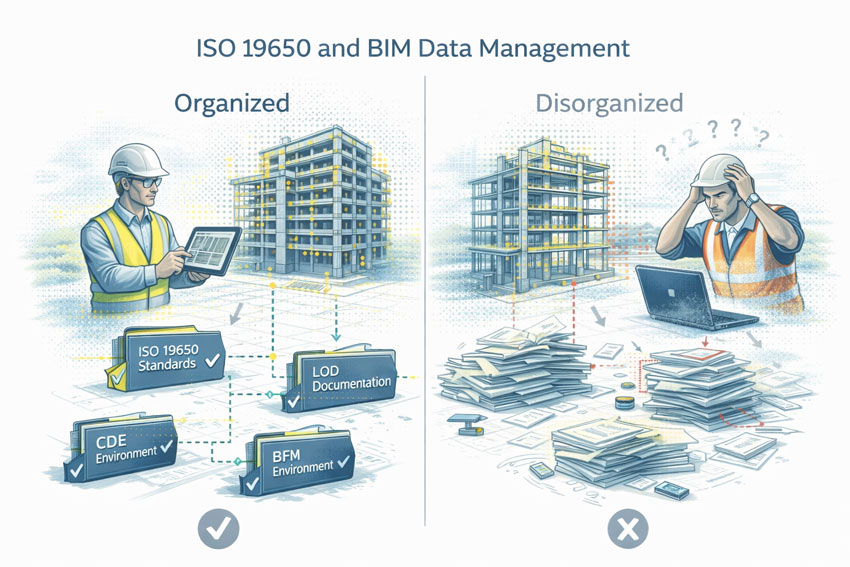
Illustrated comparison of ISO 19650 BIM information management, showing an organised digital model with structured data on one side and a disorganised model with fragmented documentation on the other.

Engineering Responsibility and Certification Risk

When LiDAR data is used to support engineering decisions, responsibility does not sit with the scanner or the software. It sits with the engineer relying on the data.

If measurements cannot be demonstrated as accurate, repeatable, and appropriately controlled, they are not suitable to support engineering sign-off. This is particularly relevant where scanning data contributes to certification outcomes, where accountability and defensibility are essential.

Engineering certification must be based on verified measurements, supported by controlled data capture and documented processes:
https://www.hamiltonbydesign.com.au/home/engineering-services/engineering-certification/


Why AS ISO 5725 Matters in Practice

AS ISO 5725 is not about paperwork or compliance for its own sake. It provides the framework that ensures measurement data used for engineering decisions is fit for purpose.

When LiDAR scanning is undertaken with accuracy, precision, and calibration treated seriously, it becomes a powerful engineering tool. When these principles are ignored, scanning becomes a source of hidden risk that only emerges when it is too late to correct cheaply.


Hamilton By Design logo displayed on a blue tilted rectangle with a grey gradient background

Final Thought

3D LiDAR scanning is only as reliable as the measurement discipline behind it.

AS ISO 5725 provides the foundation for understanding whether scanning data can be trusted. In engineering, fabrication, and certification contexts, that trust is not optional โ€” it is essential.


Structural drafting services button
Building and construction services button
Mechanical drafting services button

Our clients:

Name
Would you like us to arrange a phone consultation for you?
Address